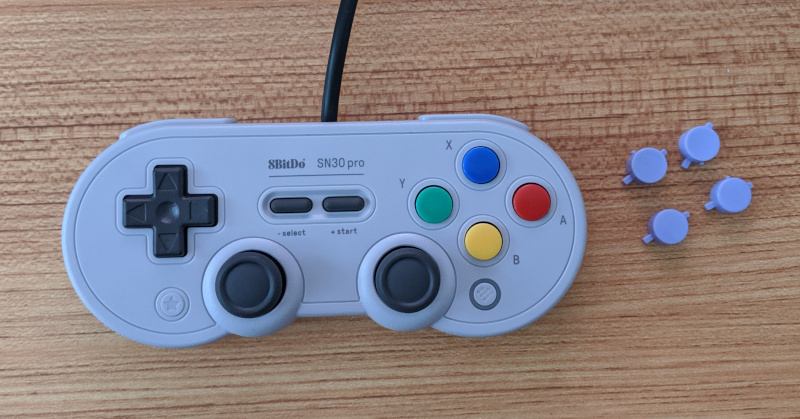
The 8bitdo SN30 Pro USB and the buttons we’re going to install.
This is a project documentation on replacing the default SNES buttons (region “North America”) with colored Super Famicom buttons (all “PAL” regions) on an 8BitDo SN30 Pro USB gamepad.
The following tools are needed in order to replace the buttons
And of course you need the replacement buttons. All buttons being the size of the original SNES/SFC buttons will work. You can get them on eBay or AliExpress just fine using the keywords super nintendo buttons or super famicom buttons. There are also plenty of other online stores that sell the buttons.
Please be advised that the varranty is void when opening the case and chaning original parts. I am not affiliated with 8bitdo nor can I give any warranty for anything that was done using this project documentation for manipulating own hardware.

The 8bitdo SN30 Pro USB and the buttons we’re going to install.
The controller is available via 8bitdo and easily findable on plenty of online stores using 8BitDo SN30 Pro USB as search keyword.
It is actually quite easy to disassemble the case. Everything is held together by various screws. There are no plastic connectors that click in to anything.
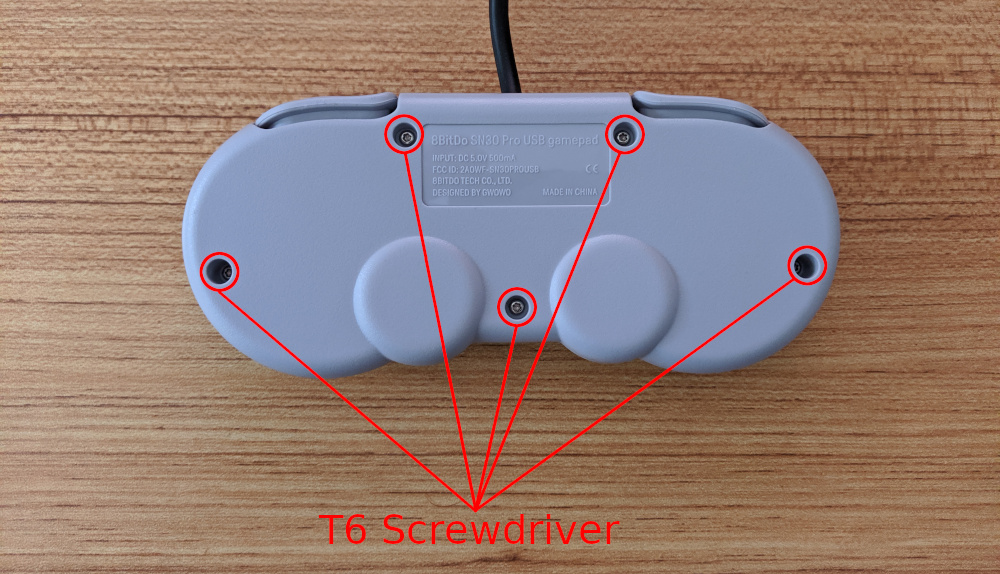
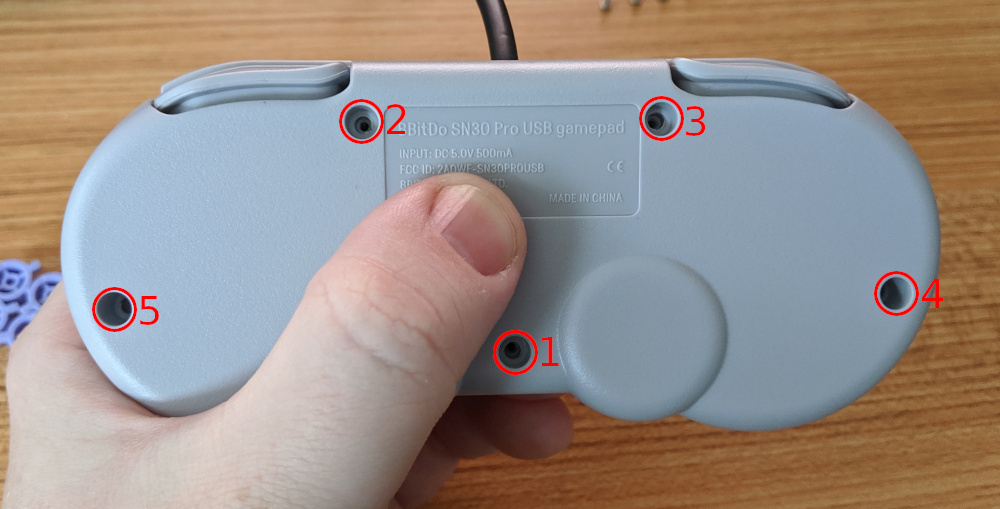
Start by removing this screws.
When the buttons are removed the back side of the case can simply be removed by pulling it slightly up (one side will be come up first, simply open the case in this direction).

Remove the screws with the correct tools.
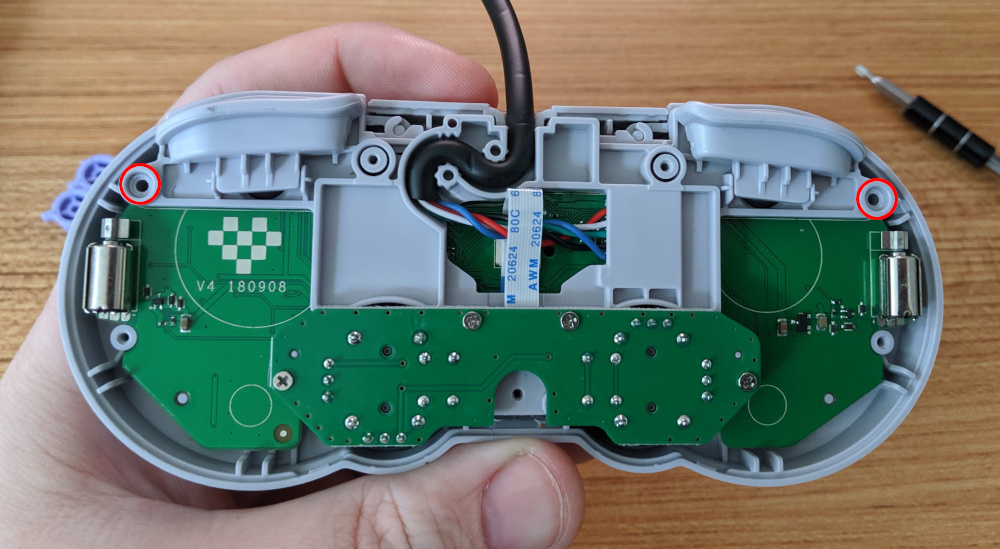
After removing the marked screws it is possible to simply lift off the sticks board. Under this board there are two more screws that have to be removed.
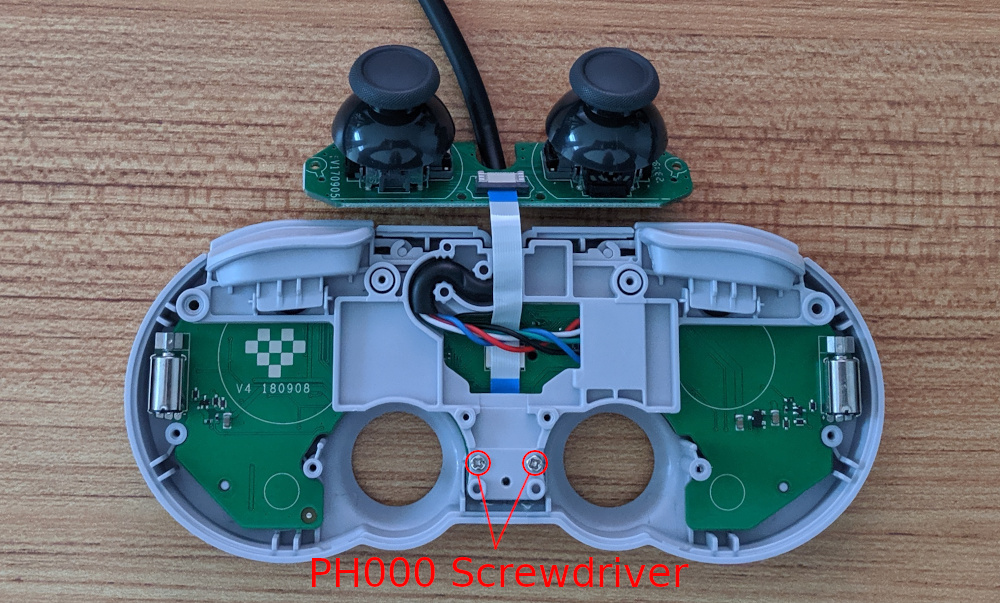
Carefully lift off the sticks board and remove the marked screws.
When the screws are removed the board as a whole can be taken off the case. The holder for the triggers and the boad are not connected. Be careful not to disconnect them. Always hold the board and the plastic parts together when taking everything off.
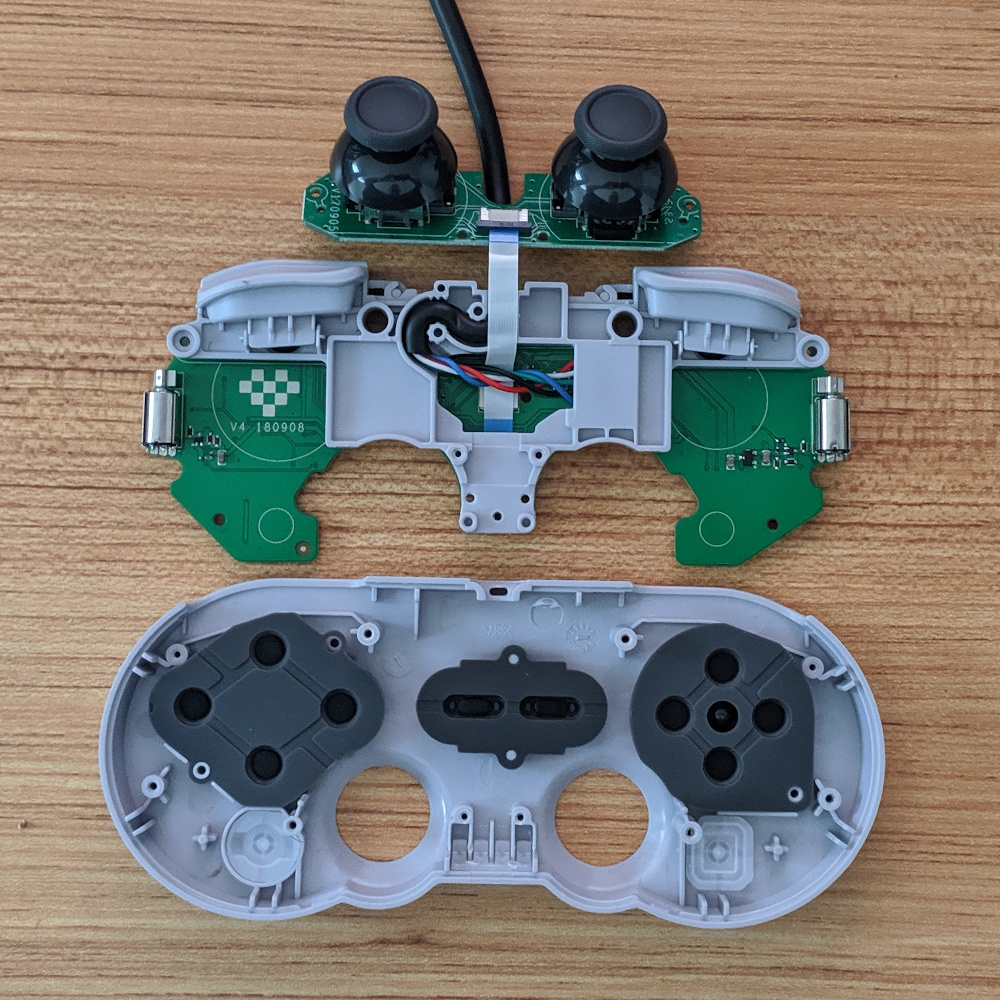
Put the board aside. We won’t do anything with it.
Now remove the silicone pad that covers the buttons. Notice the small dents that aid putting in shaped buttons like the buttons used for X and Y on region “North America” SNES versions. Replacement buttons might not have the counterpart. This is not critical because “PAL” regions SNES (commonly called Super Famicom in the United States) buttons are not directionally shaped.
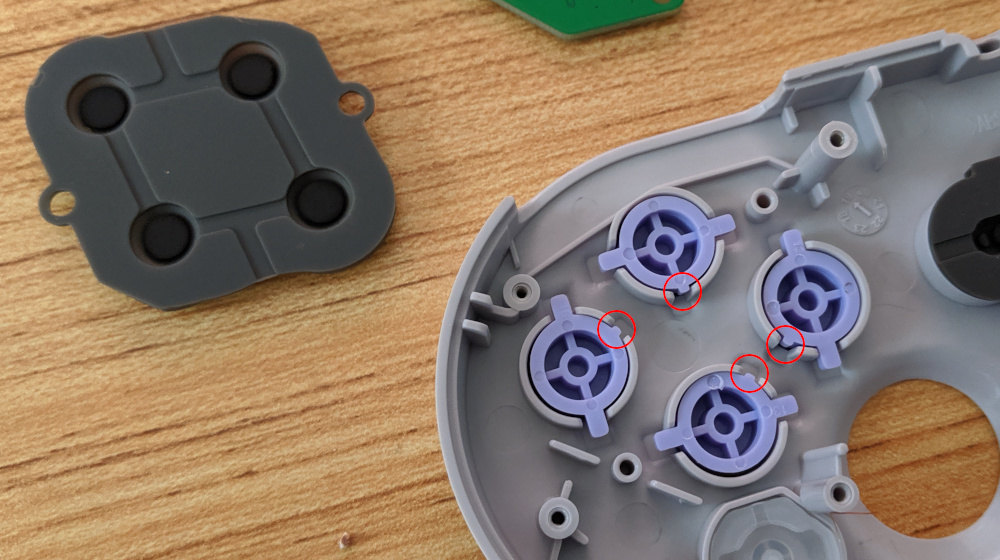
The “directional dents” are only relevant for “North America” region SNES buttons. Some SFC colored buttons use the dents to “color code” the position of the buttons.
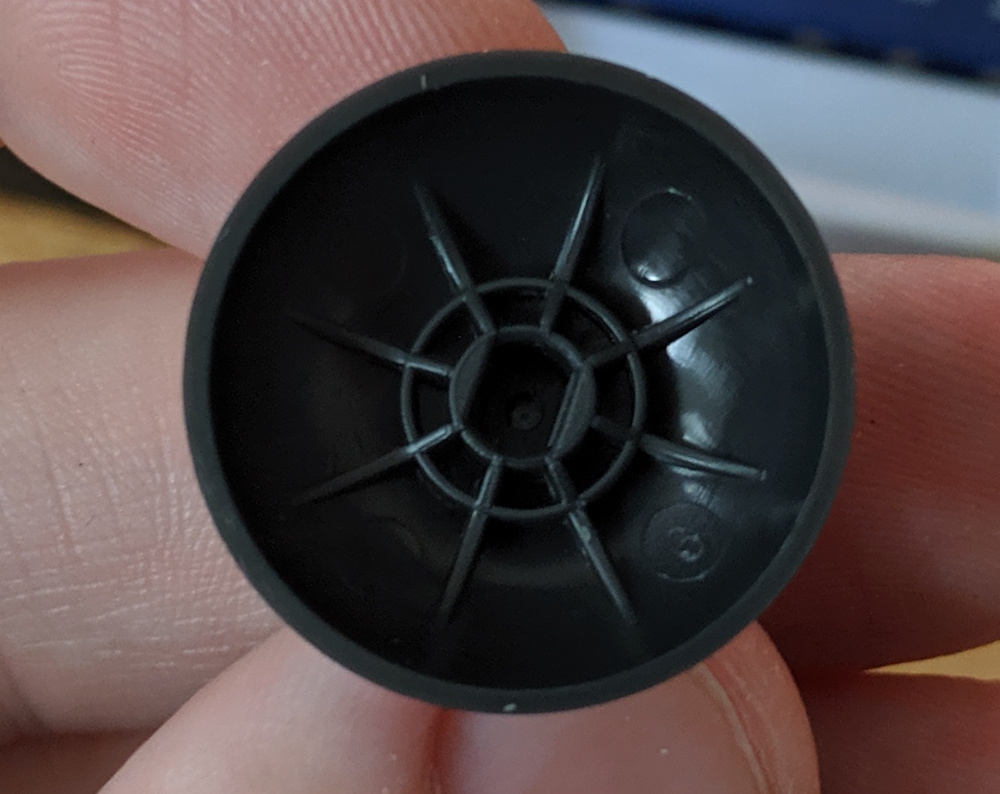
The buttons I use are slightly smaller than the installed ones. It highly depends on manufacturing quality of the replacement buttons how the results will be.

Left: My replacement buttons, right: an originally installed button.
Take off the buttons and put in your replacement buttons.
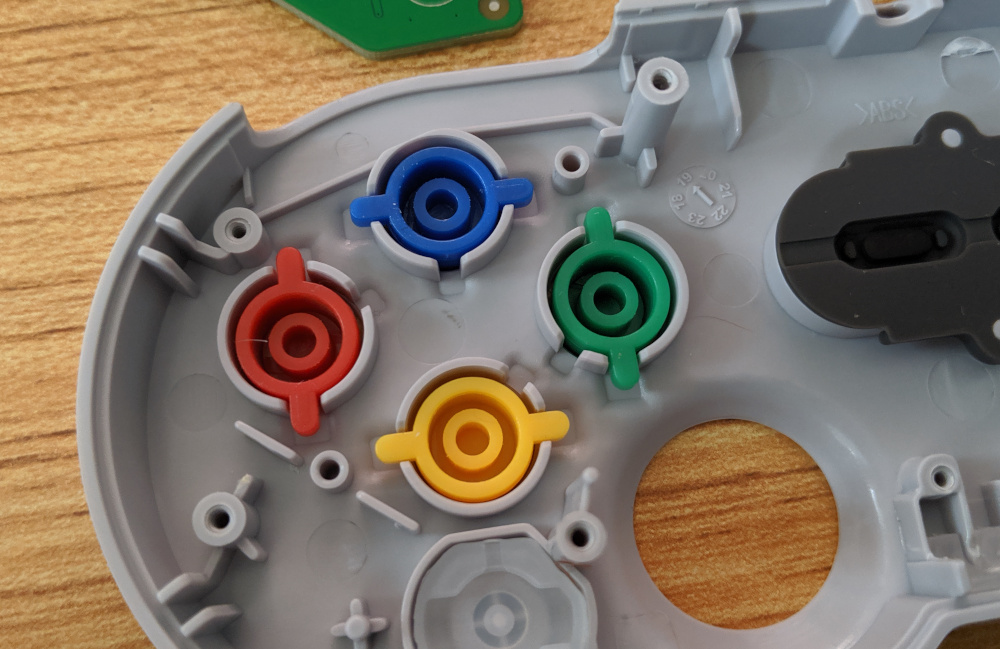
Place the buttons as shown to get the correct color order from the outside.
While we’re at it: You might be interested in the sticks connection and mechanic part. This has absolutely nothing to do with the button replacement and is just here for information.
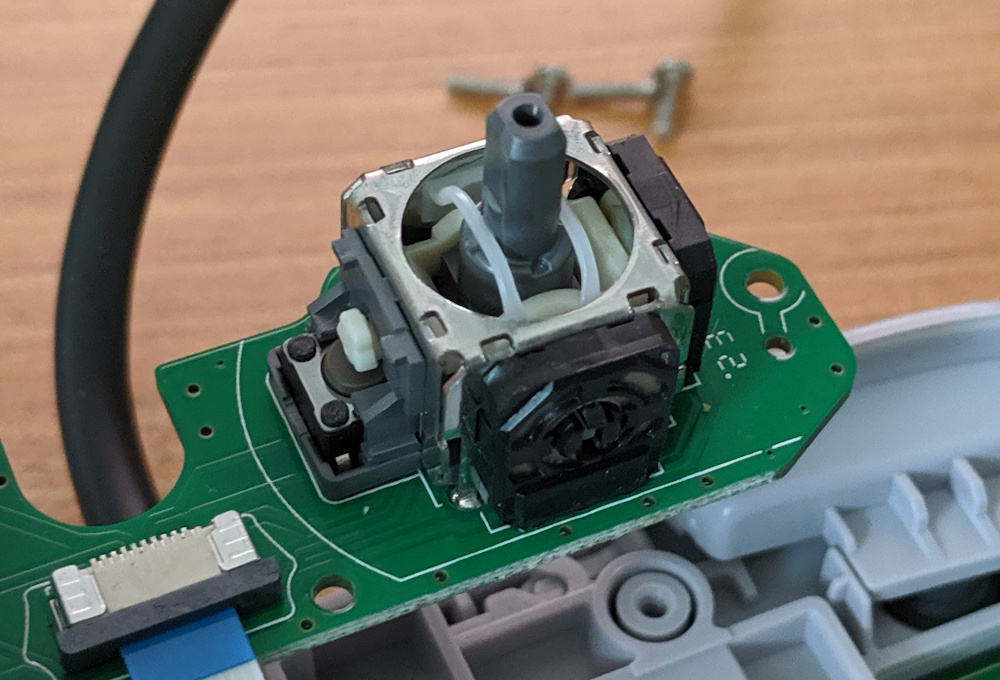

The sticks look pretty standard to me. Worth trying to attach metal PS4 or Xbox controller pro sticks …
After the buttons are added put the silicone pad back on. Don’t worry: It only fits in the correct orientation. After the pad is installed, put the board back in the case.

I noticed that first putting in the two screws that are located under the sticks board is the easiest.
When the board is installed, flip over the sticks board and install it, too. I noticed that first putting in the two screws that are located under the sticks board is the easiest.
After installing the sticks board don’t forget the two screws on top that fix the trigger holder.
When all inner screws are fixed then put on the back case and hold the controller together. Now put in the outer screws.
I figured out that this order was the easiest one.
And then you’re done …
… an SNES/SFC combination.
For giving feedback or leaving comments on this project feel free to hit me up on Mastodon: @dirk@gts.0x7be.net.